

(Thinkstock)
One of the most unsung features of iOS 8 is right underneath your finger.
Apple’s new mobile operating system
lets third-party apps access the Touch ID (fingerprint) feature in the
iPhone 5s, iPhone 6, and iPhone 6 Plus. So now, with the free iOS app 1Password and a bit of preparation, you can log in to an online account with just a quick scan of your fingerprint.
At least in theory. Though
1Password represents the holy grail for many people — the ability to
both keep your passwords secure in an encrypted vault and bypass
annoying log-ins by simply holding a finger on the home button — it’s
not nearly as seamless as anyone would like it to be.
That’s because the 1Password app
is currently compatible with very few mainstream apps. So few, in fact,
that I can list them here: Etsy, TweetBot, and VSCO Cam (those, and a few indie ones).
We hope that, as 1Password
attracts more fans, the developers of popular apps will make their
products work with it. In the meantime, you can use 1Password to speed
through logins on websites when you’re using your Safari browser.
(1Password is also available as an app and a browser plugin for Mac, Windows, and Android.)
Before you take the dive, it’s
important to understand the security implications of 1Password. The
service doesn’t actually make sites like Amazon and Facebook lockable by
fingerprint. Rather, 1Password uses your fingerprint to unlock its own
vault, which holds your passwords to those other services. That means
that you must use a super-secure password to secure your vault, and that you must continue to use complex and unique passwords for each individual service. Otherwise, your accounts remain susceptible to being hacked the old-fashioned way.
And keep in mind that the
trade-off to security is convenience. Even with 1Password, each login
takes about five taps on your phone. That’s probably less effort than
manually typing in a password, but it’s still a drag. Albeit a very
necessary drag.
Here’s how to use 1Password on your iPhone:
1. Download the iOS 8 app here.

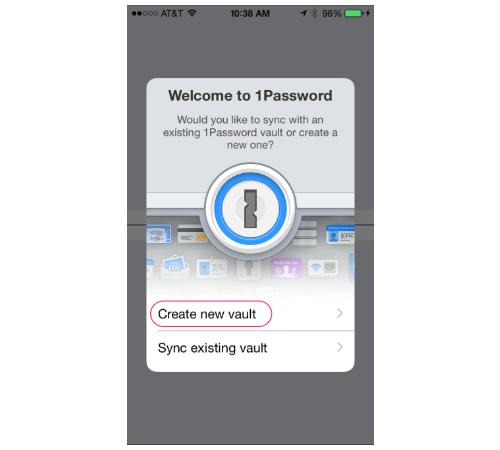
2. When you open the app, it’ll
ask you whether you’d like to sync with an existing 1Password account or
start a new one. If you’re new to this app, select the latter. Tap Create new vault.
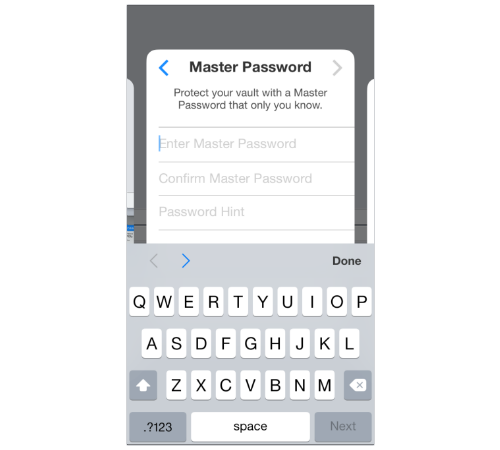
3. You’ll then be prompted to enter a Master Password,
which is the one phrase that you’ll need to access all the other
passwords you store. I know, I know: You’re probably already feeling
password fatigue. But make a real effort here: Make it complex, long,
and unique. Treat this one as the most important password you’ll have,
because it will hold the key to all your other passwords. I’d
recommend that you create a string of lower- and uppercase characters
with a few symbols and numbers mixed in. Please don’t make it one of these.
4. Here’s the exciting part! You
can enable your iPhone’s fingerprint scanner to unlock 1Password
whenever you open the app. This way you don’t have to type in that
super-difficult password you created just a few seconds ago every time
you want to log in to something.

You can always adjust or expand these settings by heading to the app’s Settings section and navigating to Security → Touch ID.
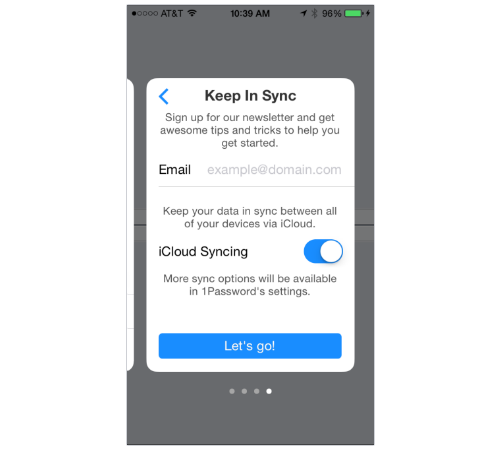
5. Next comes a prompt to sign
up for 1Password’s newsletter, but that’s not necessary. You’ll also be
given a choice of whether you’d like to sync your data via iCloud (this
may take a few seconds). If you use Dropbox or another cloud storage
service, skip this step. You can always add those accounts later. When
you’re ready to begin, tap Let’s go! (1Password’s exclamation point, not mine).
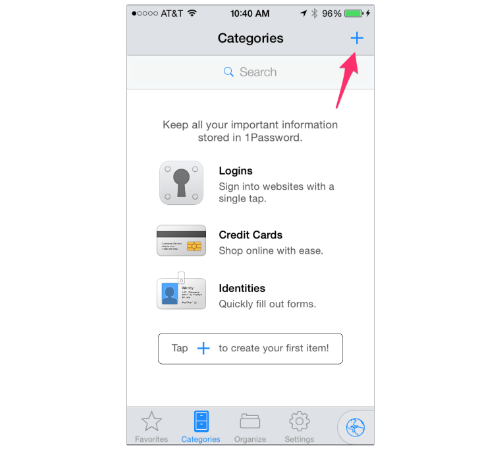
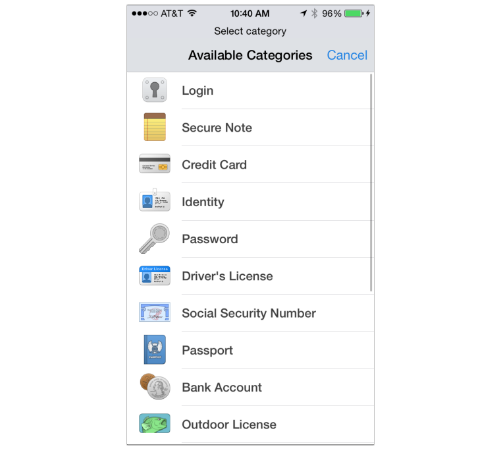
6. You’ll be brought to a Categories
page. This is where you’ll be able to create and organize your many
digital accounts, credit card information, and form fodder. To create
your first one, tap the + button in the upper-right corner of the screen.
7. Whenever you want to enter a
new piece of information into the vault, you must first categorize it.
I’m guessing you’ll be using this tool primarily for log-ins, so let’s
start there. Tap Login.
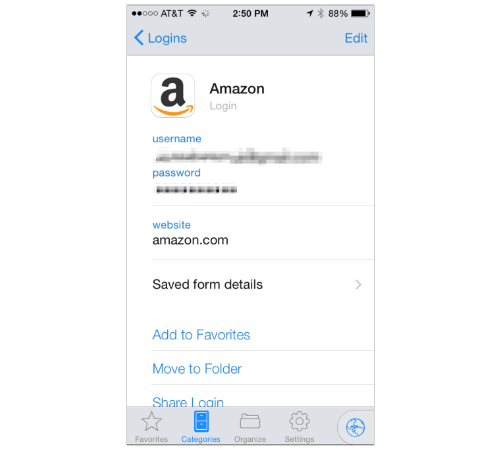
8. You’ll be asked to name the account and type in your username. Below that, there’ll be an auto-generated password.

The idea here being that if this
is a brand-new account, you can automatically use this ultra-strong
password to access it. Chances are, however, that you’ve already
established log-in information for sites like Facebook and Amazon. It
might be safer to change your password to a random string of letters and
numbers, but that involves actually logging into the website in
question and resetting that info. If you’d rather not do that right now,
simply delete that section and type in your password for that service.
Below that, you’ll see a place
to enter the name of the site this log-in works for. You can type
something like “Amazon.com,” and 1Password will automatically generate
the company’s symbol in the log-in profile.
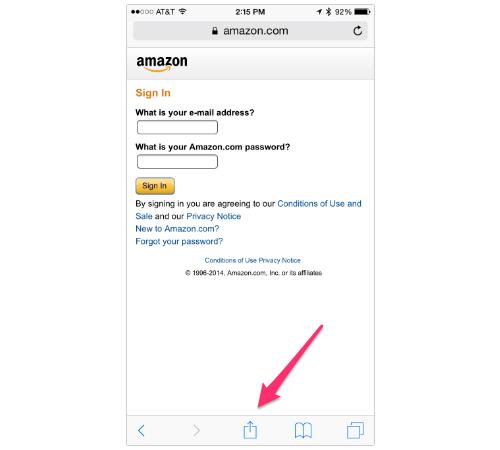
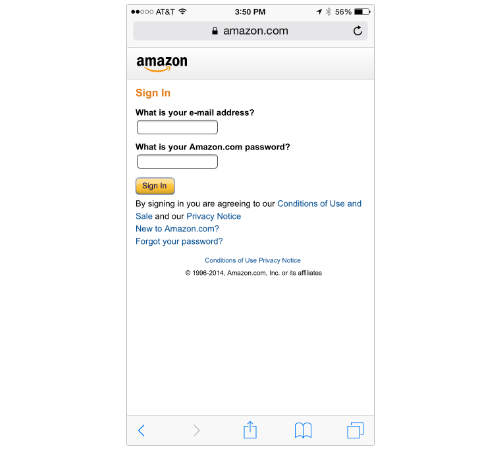
Don’t celebrate just yet —
you’re far from done. Next up, you’ll need to open up Safari and tap the
Share button at the bottom of the screen.
Swipe left over the lowest tier of icons all in gray until you see the More icon. Tap it.
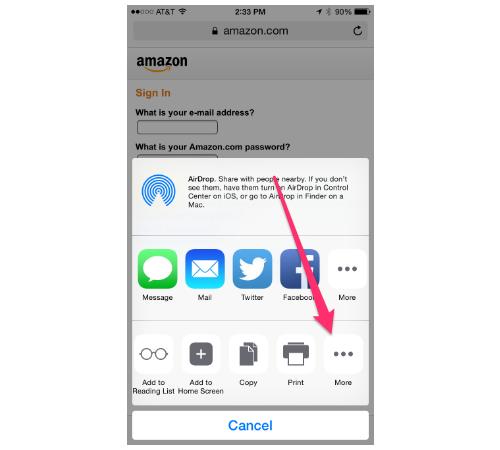
10. You’ll see a page titled Activities. At the very bottom of it, there’ll be an option to enable 1Password.
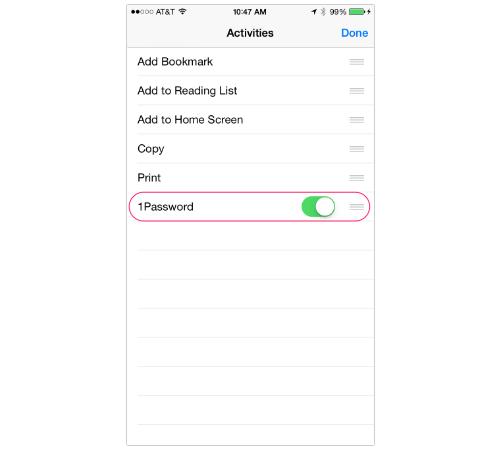
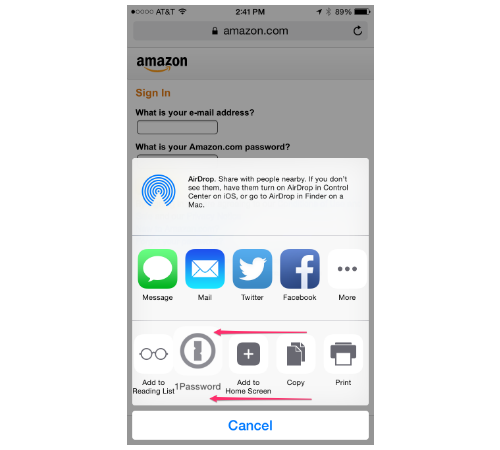
11. When you’re done, go back to
the share options. The 1Password icon should now show up in your
choices. If you don’t want it to be so hidden, then simply hold your
finger on the app icon and drag it to the left.
Phew; now you’ll never have to do that again. Good riddance.
12. It’s time to go to a website
you’d like to log in to. For this to work, you have to have first
created a log-in profile for this site within the app, obviously.
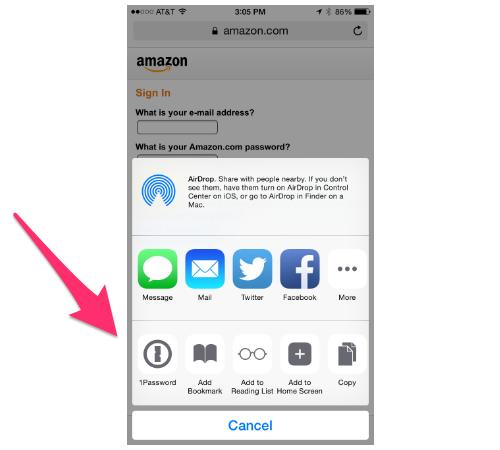
Tap the Share button and select the 1Password icon.
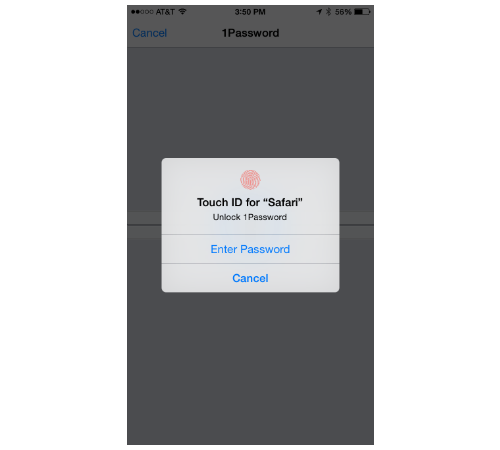
The 1Password vault will
show up. At this point, you can either enter your master password or
hold your finger down on the home button for Touch ID.
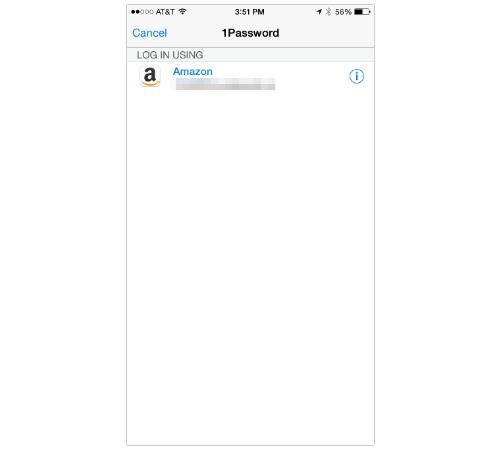
13. 1Password will
automatically analyze what website you’re on and generate the best
log-in option. In this case, it automatically recognizes Amazon. Tap the
name.
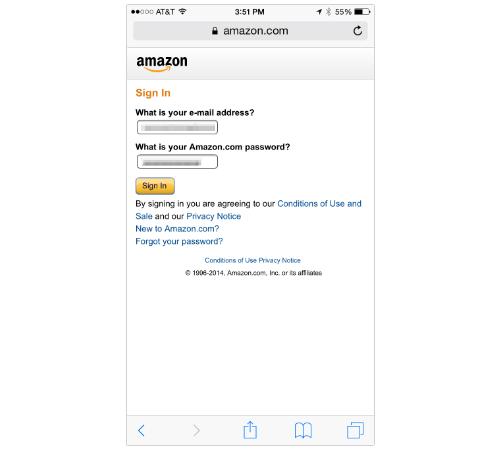
14. Your login information will load, and then you’ll have to tap whatever Sign In button the site provides.
And now you’re done. Well, sort
of. You’ll need to create profiles for every other log-in or credit card
you feel like having on hand. Needless to say, this is a project you
might have to set aside some time for (or, for the advanced user, you
can synchronize your mobile version of 1Password with the copy running
on your Mac or PC).
It takes a while, but in the long run it’ll be worth it.
